
- Setting up your Google blog account to connect to your personal domain name.
- Configuring the DNS settings for said domain name to prove to Google that you have authority over it.
Google has several methods available when it comes to verifying your authority over your domain name. We’ll be covering the CNAME METHOD (main) and the TXT METHOD (alternative)
Setting Up Your Blog Account With Google (CNAME Method)
1. Log into your blog with Google
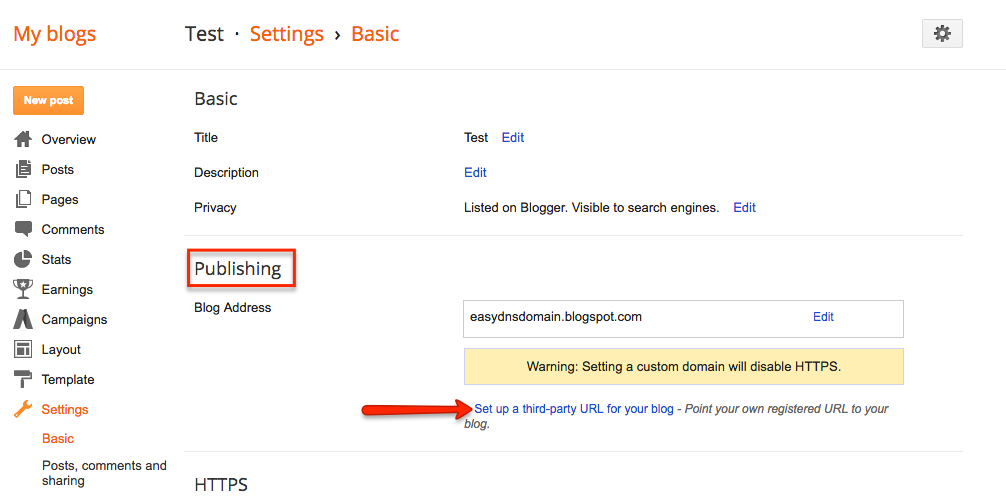
2. Click on the dropdown menu and choose SETTINGS
3. Under the PUBLISHING section, click on SET UP THIRD-PARTY URL FOR YOUR BLOG
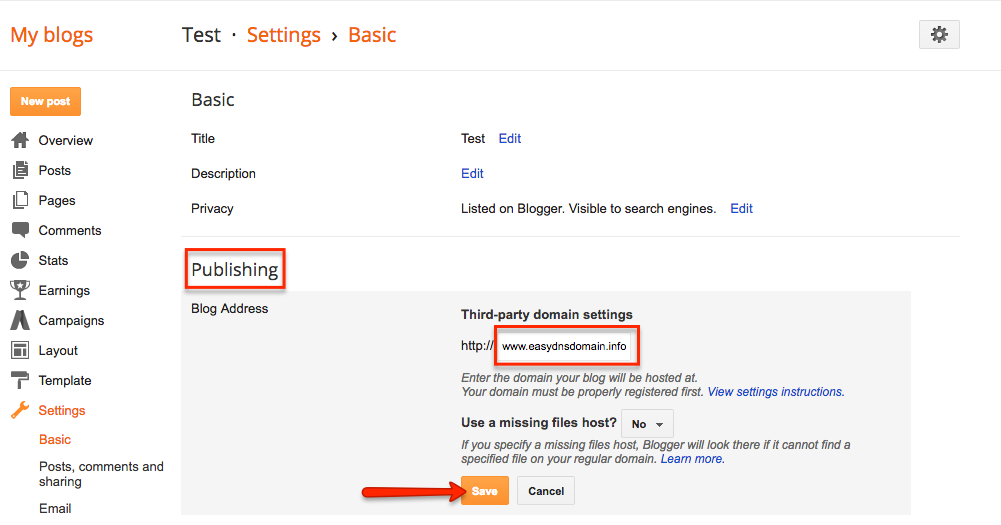
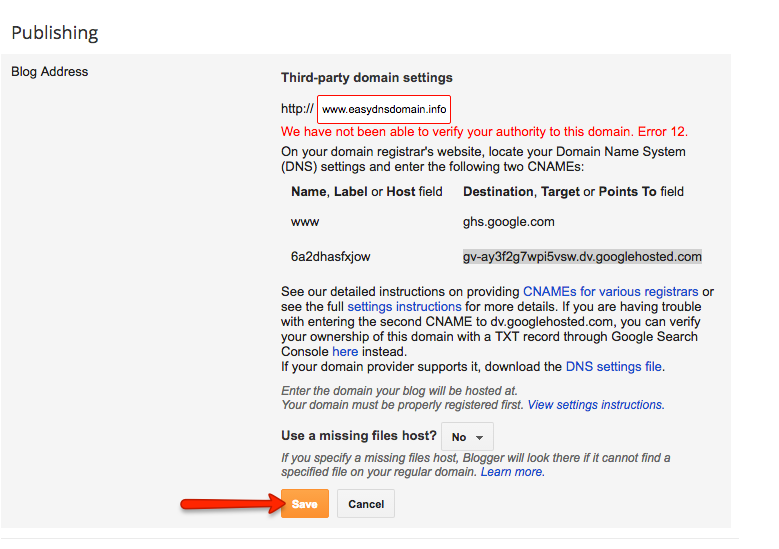
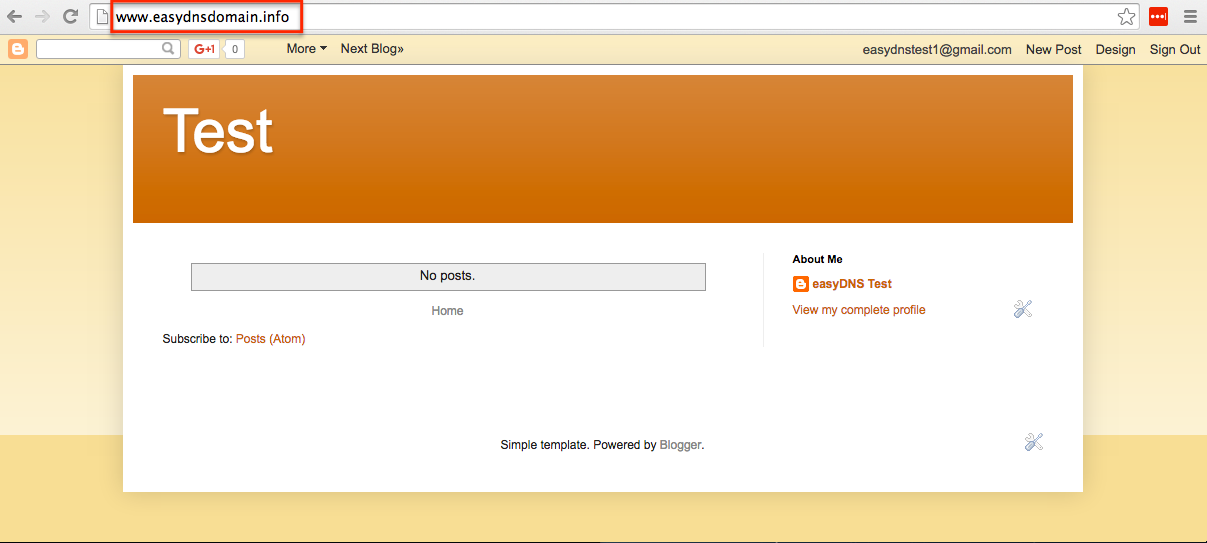
4. Enter your domain with www and click SAVE
Once you’ve clicked on SAVE, you should see an error message similar to the following:
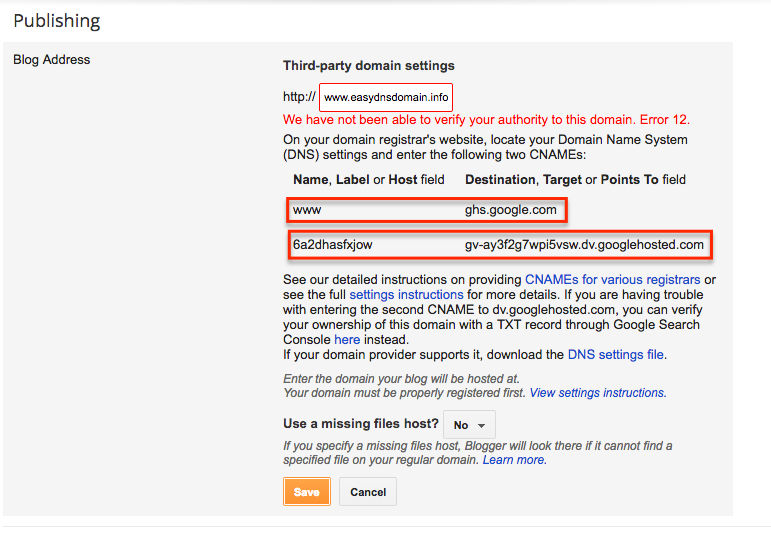
Within the error message you should see two sets of CNAME records. This is the information Google uses to verify that you are indeed the owner of the domain name. You will need to take these two records and put them into your DNS settings. *DO NOT CLOSE YOUR BLOG WINDOW WHILE YOU DO THIS!*
Verifying Your Authority Via Your easyDNS Account
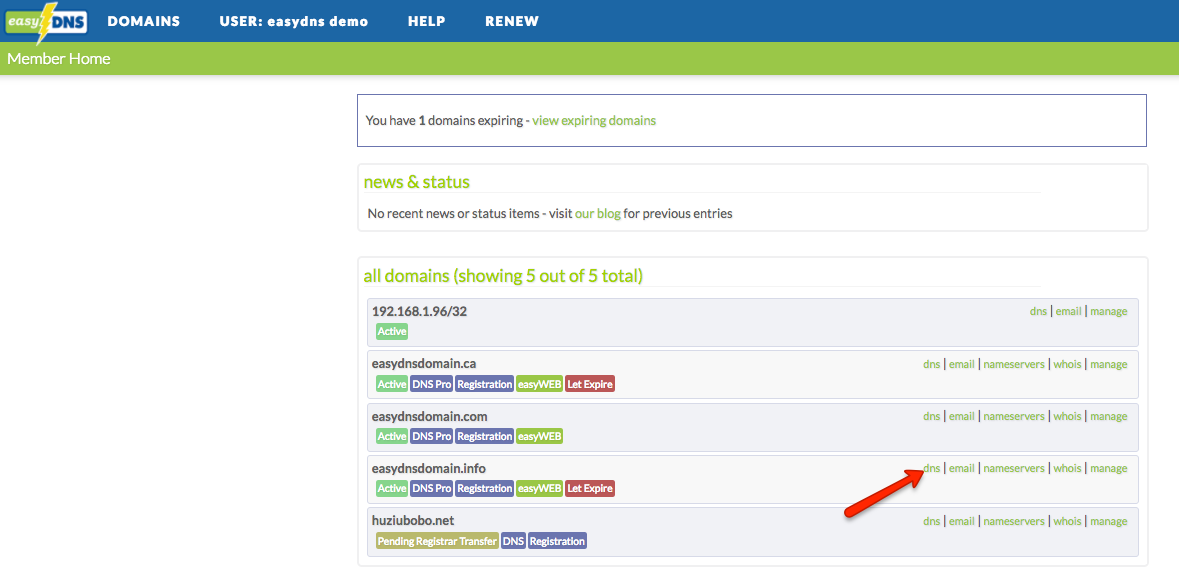
1. Log into your easyDNS account
2. Click on the DNS link for said domain (this will bring you to the DNS SETTINGS page)
3. Click on the MODULAR EDITOR tab
4. Click on the wrench tool for ALIASES CNAME RECORDS
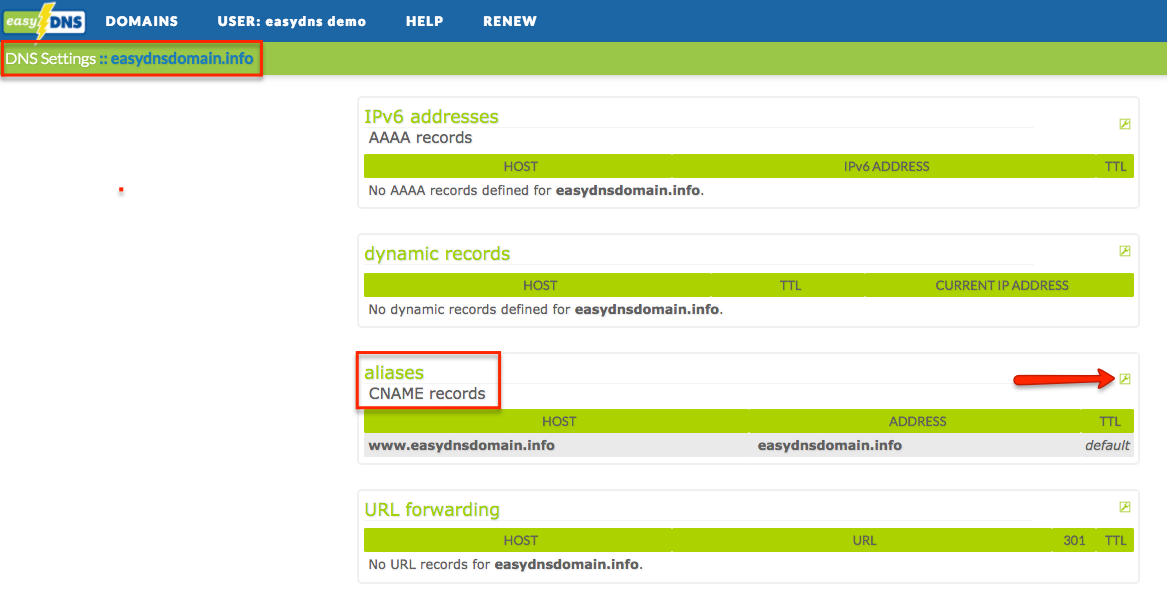
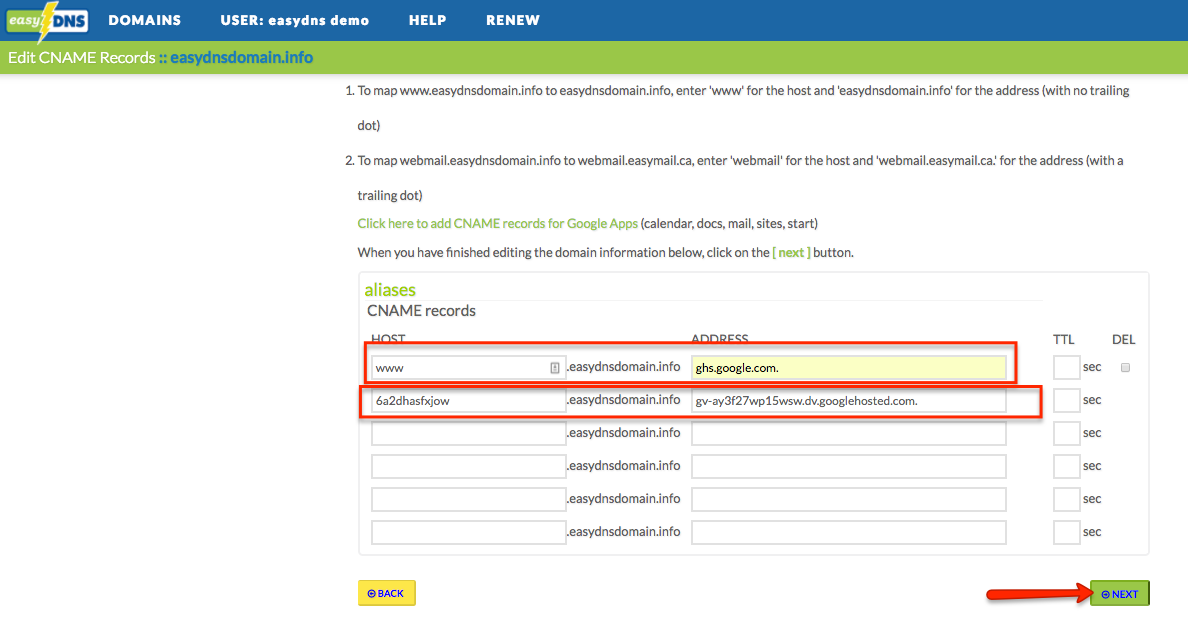
This is where we enter the two CNAME records Google provided us on their error page. Please note that both the www and the short string of numbers/letters will go under HOST while the ghs.google.com along with the longer string will go under ADDRESS.
5. Enter your CNAME records
6. Click NEXT
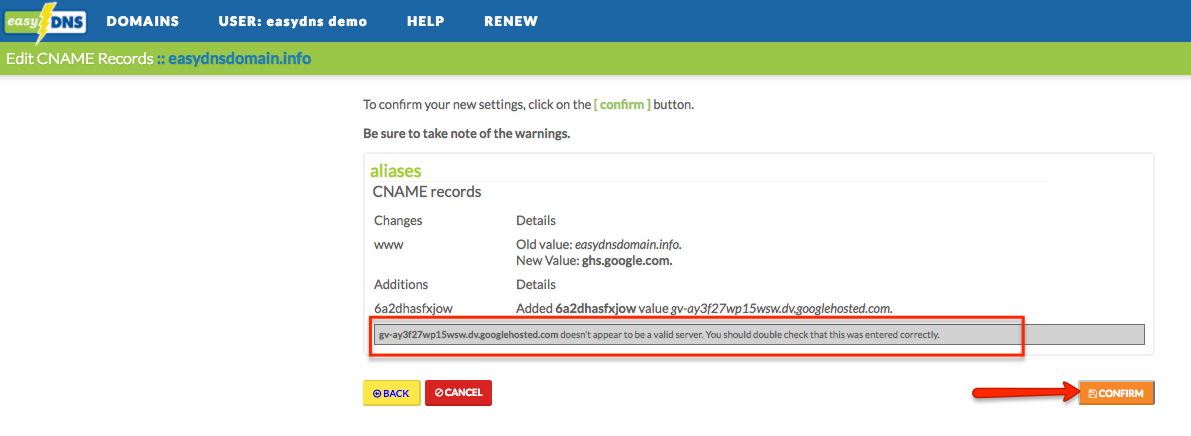
7. Confirm your changes
8. Click on the wrench tool for HOSTS A RECORDS
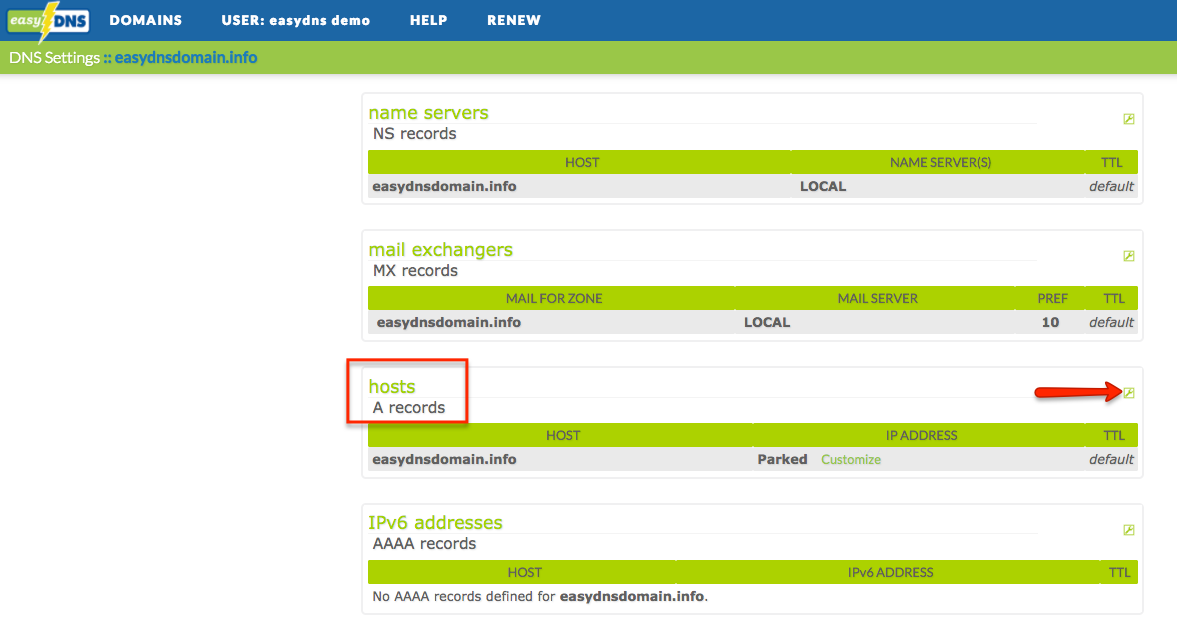
9. Enter ‘@’ under HOST and the following IP addresses under IP ADDRESS:
216.239.32.21
216.239.34.21
216.239.36.21
216.239.38.21
10. Click NEXT
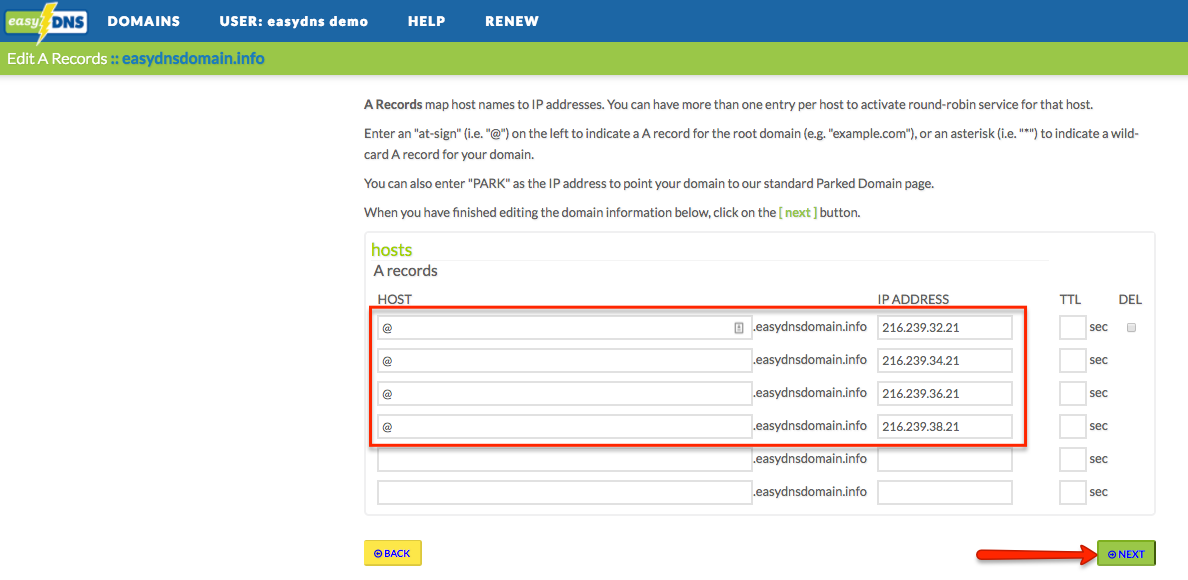
11. Confirm your changes
Finalizing The Changes At Blogspot
Once you’ve put in the CNAME records within your DNS settings, you will need to go back to the blog window with the error message that should still be open.
Please do the following:
1. Click on SAVE
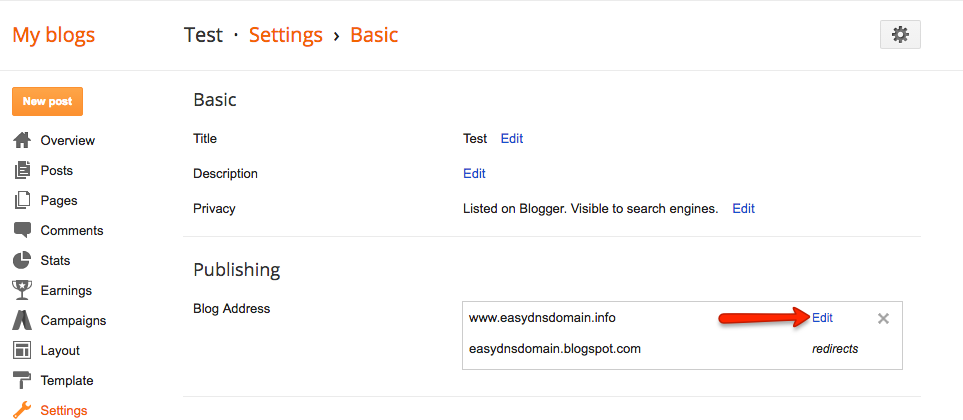
You will notice that the error message has gone away. If this is the case then your domain name should be successfully connected to your blog, but you still have a few more steps to complete.
2. Go back to the Publishing section for your blog and click on EDIT
3. Check the box for REDIRECT YOURDOMAIN.COM TO WWW.YOURDOMAIN.COM and click SAVE
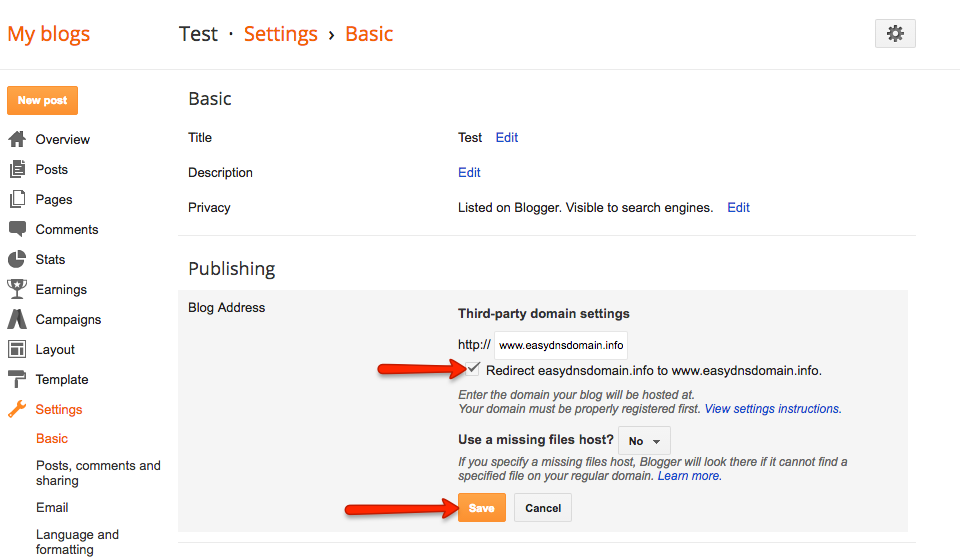
Your blog should now be connected to both yourdomain.com and www.yourdomain.com.
Alternative TXT Method
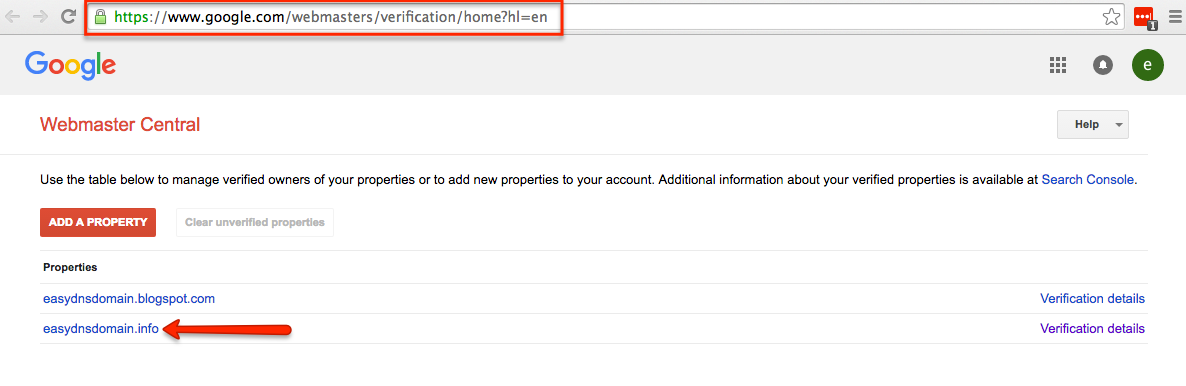
If you fail to verify your authority to Google through the CNAME Method, you can try the TXT Method. To begin this process, you’ll first want to go to the following link and find your domain name:
https://www.google.com/webmasters/verification/home?hl=en
Once there you’ll want to do the following:
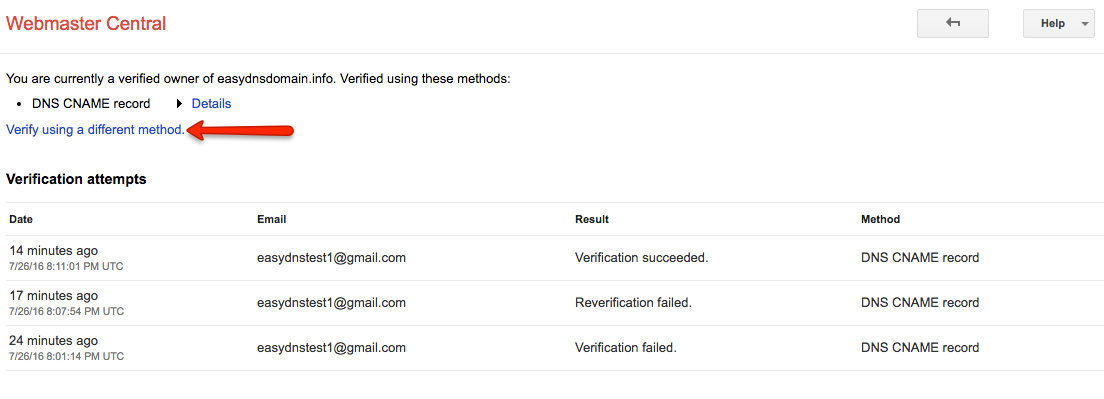
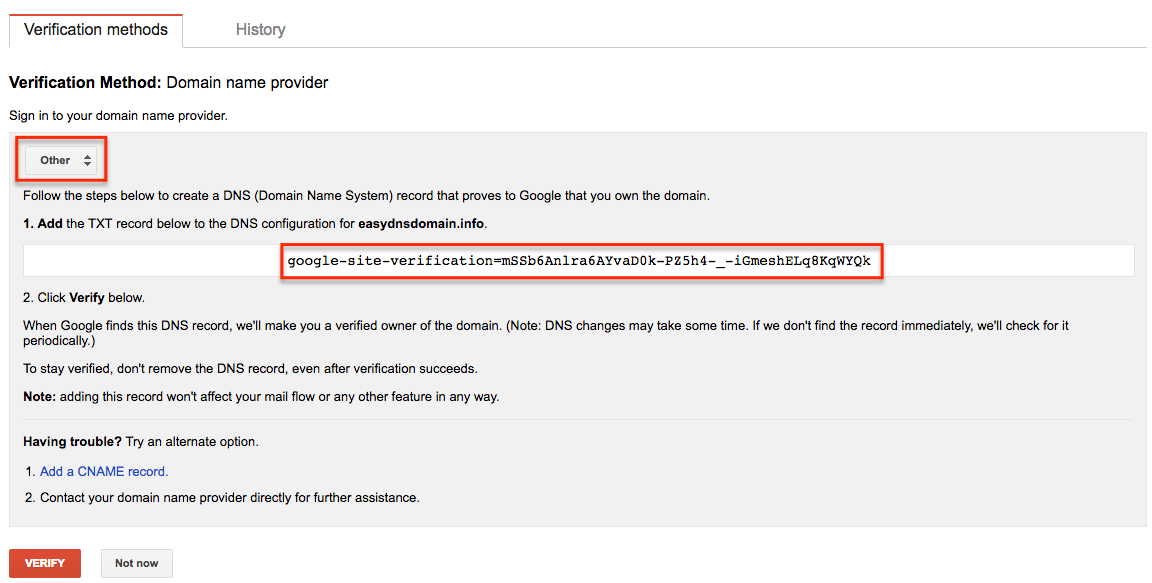
1. Click on VERIFY USING A DIFFERENT METHOD
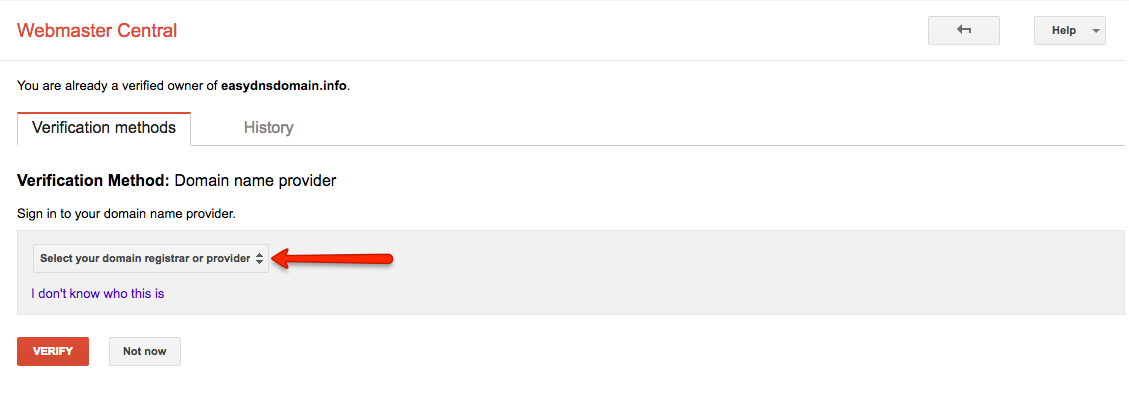
2. Select your domain registrar from the menu given (you’ll choose OTHER for easyDNS)
3. Copy the TXT record Google provides you (make sure to keep this page open)
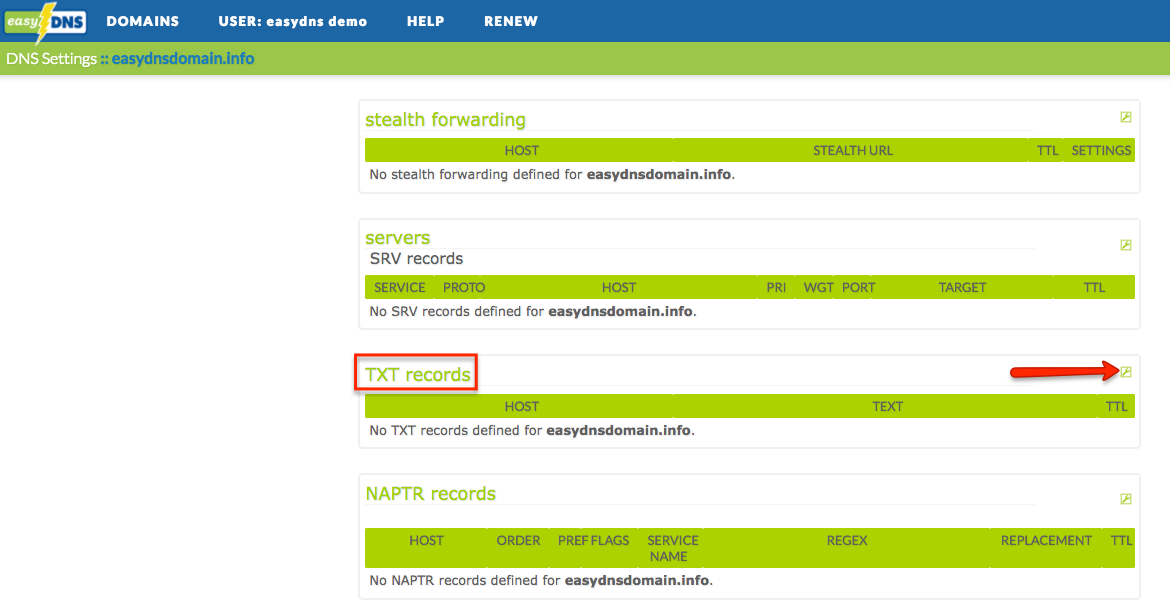
4. Log into your easyDNS account and go to the DNS SETTINGS page for your domain
5. Click on the MODULAR EDITOR tab
6. Click on the green wrench tool for TXT RECORDS
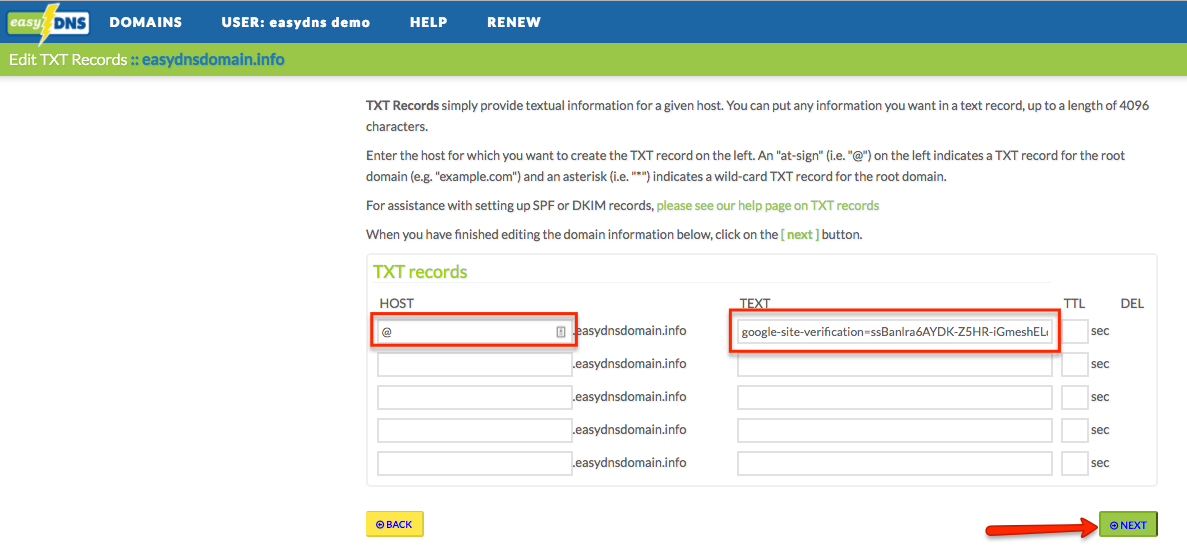
7. Enter ‘@’ under HOST and paste the TXT record you copied earlier under TEXT
8. Click on NEXT and confirm changes
9. Go back to the Google page you copied the TXT record from earlier and click on VERIFY
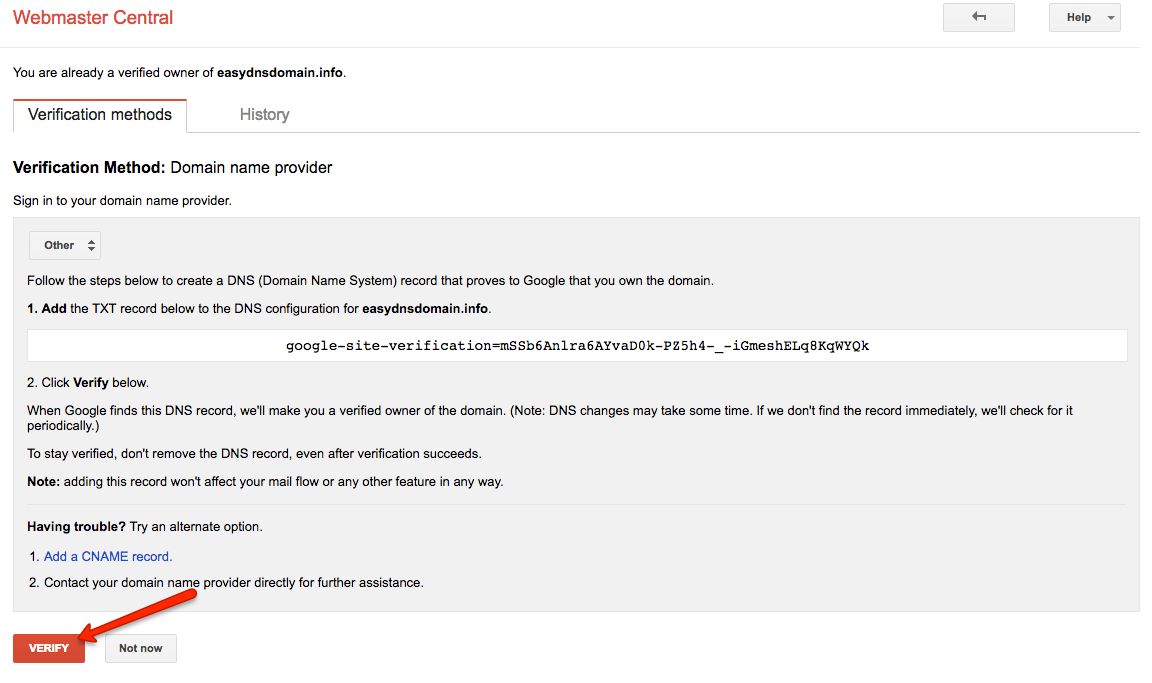
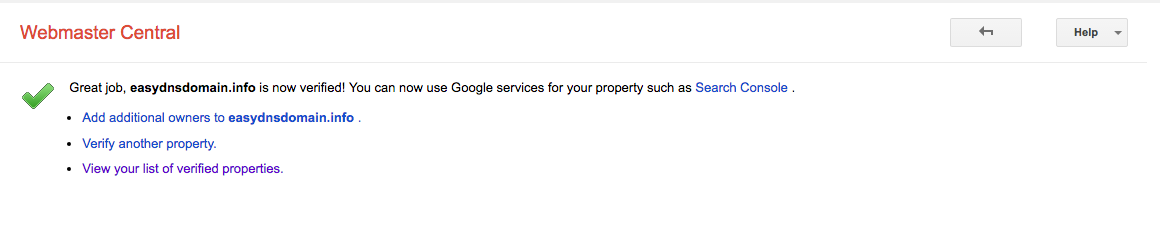
You should now get a confirmation page that your domain has been verified:
If you find that you are still having issues connecting your domain name to your blog, we do have a service where we manually make the connection for you. Please contact our support team for further details about this service.